
Astron Study Guide
The
Table of Contents
Note Taking
Lectures & Lessons
There are various methods of note-taking, and it should be noted that there isn’t one right way. Everyone has there own way and style that others may or may not benefit from. In essence, choose a note-taking method that suites you best. Although there may not be a “right” way to take notes, there are a few commonalities.
You’ll notice that in the images provided below, the writings are usually contained within the red lines on either side of the lined paper. This is because, as a general rule of thumb, you should avoid writing outside of these lines for readability, neatness, and standardization. Another general rule is that all notes, ideally, should be taken by hand. Yes, you may not have enough time, but that’s why they’re notes. They are a future reference for things you may not know, and writing them down helps you retain the information better than if you were to type it.
Below I’ve provided note-taking methods, their function, and potential uses.

Outline Notes
Outline note-taking is the process of writing important topics or main ideas in chronological order as they’re presented from the top of the page to the bottom. Sequential subtopics, ideas, or terms are usually indented and written directly under their corresponding topic. It’s not often that outlines have illustrations, but they may be present to help visualize a concept or elaborate on an explanation.
Through this note-taking method, the final product should be an organized note page with structured information that is easy to locate and read, facilitating ease-of-use and review. These type of notes also present a hierarchy of information in which provides supporting details and explanations for related topics and ideas, ultimately allowing one to identify relationships between concepts.
Such a note-taking method can be used when covering material presented in a structured format, such as a slideshow, lecture, or textbook. It can be particularly useful to use such notes when reviewing for exams, as topics are already divided and subdivided into their respective areas.

Cornell Notes
The Cornell note style is a layout on a page that divides content into two primary sections: a column of ideas, terms, and questions; and a box of descriptions, answers, and explanations. At the bottom of the page, there is a wider box that summarizes the material covered and lists key points. The size for each column and box can be adjusted according to preference and necessity.
In the end, you should be left with a structured note page that captures the lesson taught as a whole. The Cornell Note style should ultimately help you study, as it can aid in your ability to retain information, help you identify connections, and define key terms or ideas. The clarity in which information is presented can also make it easier to see “big picture” or a more grand idea without the need to become seriously pensive.
The Cornell Note style should be used in similar areas where outline notes are used, such as in lectures, slideshows, or textbooks. However, it should also be utilized to record your own questions, comments, and thoughts as well as other resources regarding exam material.

Charting Notes
The charting note style is a layout on a page that divides content across grid like sections according to elements organized into rows and columns. Recorded notes won’t always be in chronological order.
Ultimately, the notes should be more condensed and easy to navigate. They should also be organized in a way that sorts all the material into a matrix where relevant, related information can be found close by. This note taking style is more of a visual aid that facilitates the identification of relationships in material and the comparison of different topics. Providing the visual guidance it does, this note style can also be useful for analyzing data, statistics, or facts through various perspectives in order to generate or better understanding different ideas.
Charting notes can be applied to situations in which you are covering previously taught content, like in reviews or tutorials, as it acts as a good reference one can easily understand and navigate at a glance. Such a note taking style is also useful in lectures or presentations, in which there is a clear structure of material and fast delivery of content.
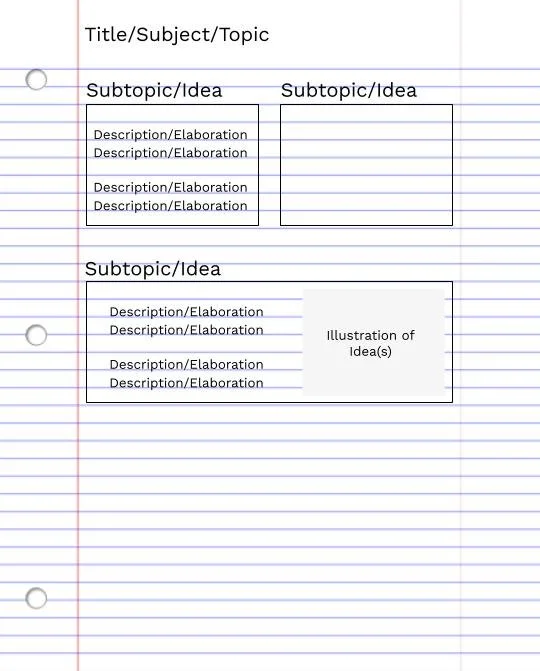
Boxing Notes
Boxing is a note taking technique that involves the sorting of information into sections dedicated a specific idea or subtopic. Similarly to charting, boxing content won’t always result in narrative product in which notes are ordered in a chronological way.
Boxing notes should provide a page with an organized collection of content that facilitates ease of navigation, reading, and comprehension. The manner in which information is organized should also allow for a straightforward way to visualize connections between different ideas, thoughts, or concepts. Given the note taking style’s emphasis on categorization and classification, it’s likely that these notes would also be hierarchical, with countless subtopics falling under bigger, more generic topics.
Boxing notes are effective for organizing lecture notes, textbook summaries, or project ideas. They work well when topics are distinct but still connected under a larger theme. This style is ideal for learners who prefer visually structured information and is also useful for preparing study guides, where quick access to key details is needed.

Mapping Notes
Mapping notes use diagrams to organize information visually, starting with a central idea and branching into related subtopics. Lines or connectors illustrate relationships, making it easier to see how ideas build on each other. The style ranges from simple hierarchies to complex webs, as the structure of these notes can change based on preference and necesity.
The final result is a dynamic note page that visually represents the topic, providing a summary and understanding of how various elements connect. The style can aid in memory retention by helping one visualize a topic more easily and simplifying complex information into a visual format. It also encourages critical thinking, as one must know how ideas are related and where they fit in the larger picture. This note style offers flexibility, as there is more space for new branches as more information is gathered.
Mapping notes are ideal for brainstorming, studying, or analyzing interconnected topics, particularly in subjects where understanding relationships is key. They help condense and present information from lectures, textbooks, and other resources in an efficient manner.

Indexing
Books & Bibliographies
Although indexing may not be the best or most efficient way of studying, keeping an index can be especially useful for accessing information quickly. Indexes are best utilized in situations where generating answers fast is beneficial, such as in timed or lengthy open-book exams. Indexes are collections of alphabetically organized names, subjects, or items with brief definitions and references to their occurrences.
Creating an index is a relatively straightforward process, however, depending on the scale of the content being covered, the structure of an index can vary. Considering the intricacies of the subject at hand, indexes may also differ in terms of complexity and navigation system. With this being said, the general form of indexing I will be covering is book indexing, covering the reading of resources such as textbooks or digital documents.
The Term Column
Indexes hold a vast amount of information, but they are meaningless without clarity and structure. To begin with, indexes should have, at bare minimum, 3 columns: the term, the location, and a concise, brief description.
When creating entries, the term column should always be first (on the left), as it’s the column that will be sorted alphabetically. Also, naturally you will be able to more easily follow a column on the far sides of the paper, like a dictionary, because it doesn’t require any effort to locate or navigate.
Terms should always be as short as possible. When entering a term into your column, always remove unnecessary words or phrases, as any unrelated information can and will significantly effect its position in the index, effectively rendering it useless if you are not able to locate it. In other words, you should make terms something that you immediately associate with the information you are looking for.

For example, if you wanted to make an index entry that leads you to a page in a cooking book that shows you the steps on how to make bread, you should not make the term for the entry “How to make bread”. By starting the entry term with the letter “H”, it will be placed in the “H” area of the index. Now say you were rushing in an timed exam and a question asked you for the oven temperature needed to make bread. The immediate thought that pops in your head will likely not be “how do I make bread” but rather “temperature” or “bread”. Therefore, it will be better to name the term “Temperature” or “Bread”. Of course, realistically, you shouldn’t make a term to specific because will likely limit the range of thoughts in which it covers.
The idea that it’s better for a term to be broad to cover a larger range of “immediate thoughts” isn’t always going to be applicable to all situations. There will be many times in which a concept is referred to as different names throughout a text. This lack of consistency will ultimately lead to confusion on two fronts: the term for the entry and the unknowing of which name they will use to reference said concept on the test. You can easily fix this by creating an entry for each name in which they use to reference the same concept. Although this adds length to an index, it will help you locate the information faster.
The Location Column
The column next to the term column will often be the location of the entry in the text. This is a quite straightforward section, but there are different methods in making this.
If covering a single book, you can create tabs for the book that display the chapter number. Here, you can enter location numbers in the general form: chapter . page. By putting the chapter alongside the page number, you can immediately go to the chapter’s tab in the text, isolating the possible places of where the page is (given that you are skimming the book to find the right page) and increasing the speed in which you locate the entry. Though, if you are not used to the chapter . page format, you can divide the location column into two parts, one with the chapter and the other with the page number.
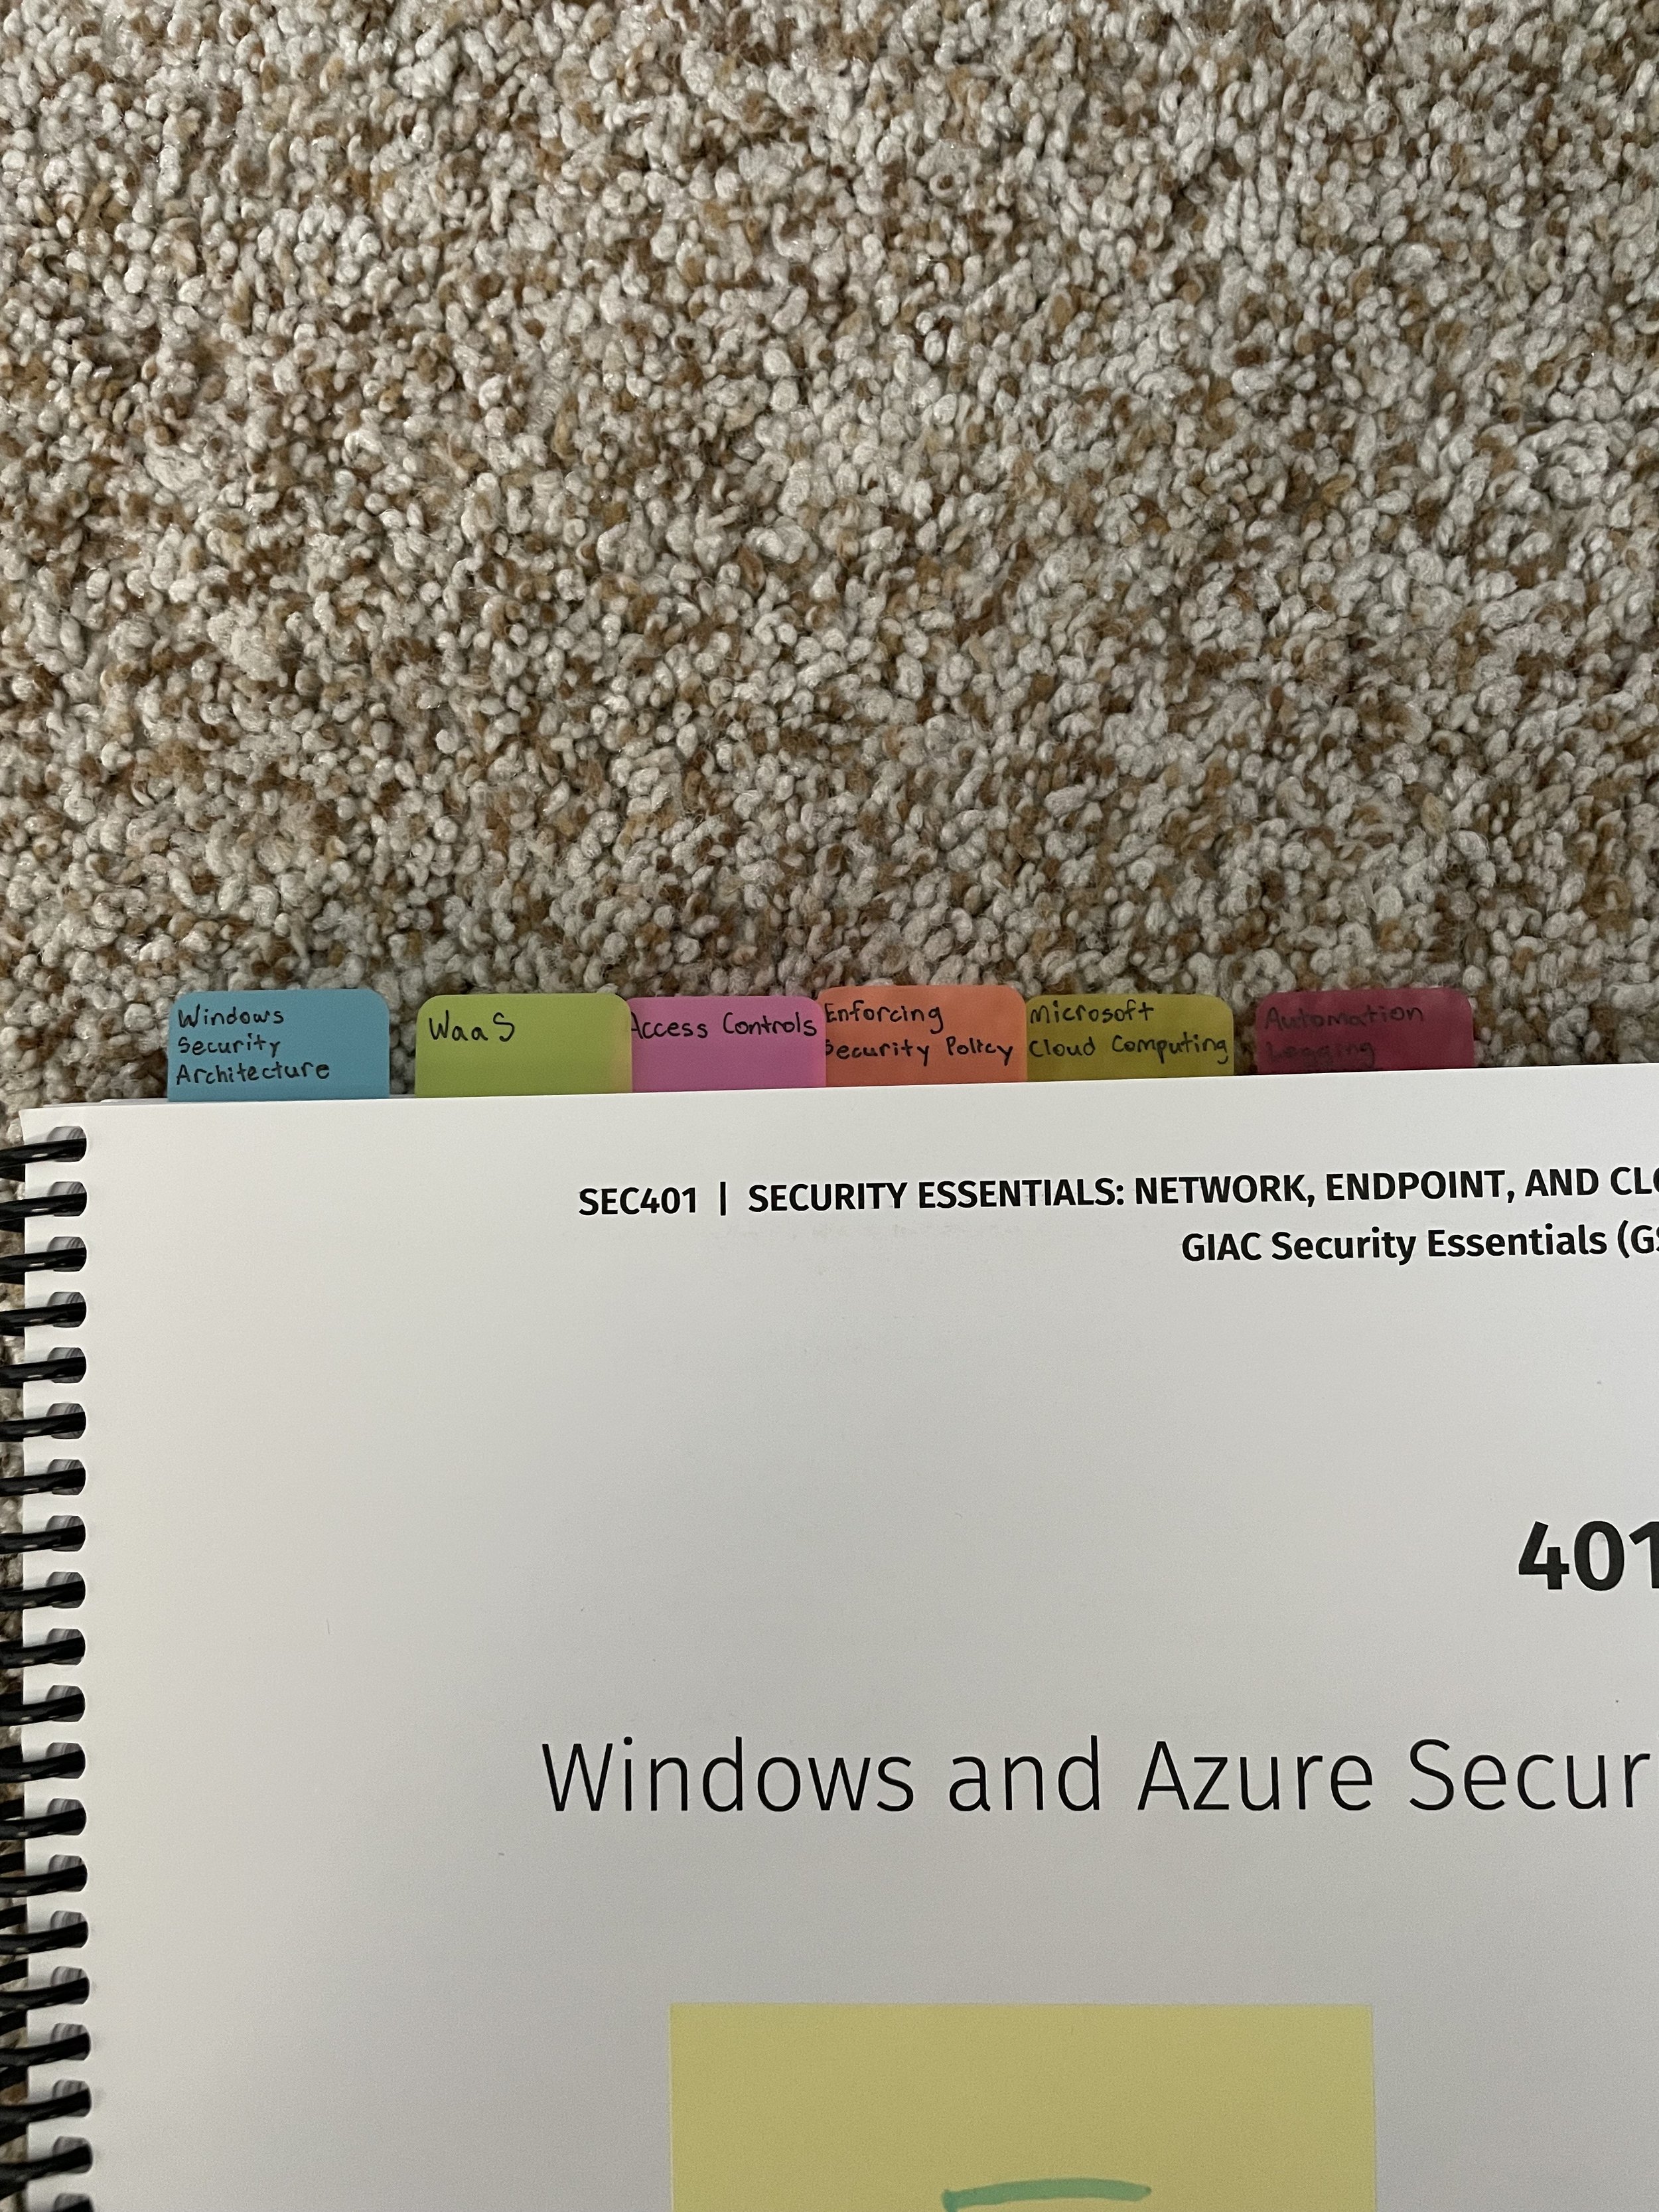
However, if you are covering multiple books, as displayed in my example below, it is still possible to use the chapter . page format. For every book you will use, use sticky notes and label each book with a number. From here you can use the general format: book . page. From here, simply find the book with the specified number and locate the page.
An additional location enhancer you can and should add is color coding. This is applicable to both chapter . page and book . page formats. By correlating an location entry’s color to a chapter or section of text you can more easily locate your tab given you’ve comfortable associated the colors with your tabs.


The Description Column
Don’t just list what words are used—index ideas and themes even if they’re not directly named. This should also be included in term descriptions. For example, if the book explains “the water cycle” without naming it explicitly, still include that term if it makes sense contextually.
Avoid mass-redundant page listings. Instead, group ranges and avoid repeating page numbers unnecessarily. Instead of: “Photosynthesis”, 14, 15, 16, 17, 18. Write: “Photosynthesis”, 14–18. However, this should only be applied in situations where there are barely any unrelated pages in between, for if too many pages in the range don’t relate to the entry, the range you set could be hindering.
Write concise descriptions. When adding sub-entries or annotations, keep them short and focused.
Most importantly, don't overload the index. Avoid indexing every single mention of a term. Focus on substantial discussions, definitions, diagrams, etc. If you end up with too many entries, using your index can slow you down. However, don’t be shy to index a lot, as the size of your index should be dependent on the content being covered, the size of the content, and how much you retain of it.
Creating clear and effective index entries for textbooks requires a good balance of precision, consistency, and user-friendliness. Here is a break-down of tips that you should implement into your index entries.
Always make sure to use clear, specific terminology. Index entries should match the way topics are discussed in the textbook. You should also avoid vague words like “things”, “stuff”, or “important”. Be as precise as the subject allows.
Be consistent with vocabulary. Use terminology consistent with the textbook and with what you use. Don’t introduce new terms in the index halfway through. Decide on variants (e.g., DNA vs. Deoxyribonucleic acid) and stick to one—unless cross-referencing.
Use cross-references effectively. As stated before, you can and should create multiple entry names that point to the same location to allow for a large scope of discovery.
Prioritize the user’s perspective, in this case your perspective. Think like a student: what term would they look up? If the topic is "quadratic equations," but the book also uses "solving quadratics," include both.
Personal Experience
During my second cybersecurity certification studying, GSEC, I used all these tips above that I have provided, though I did have my regrets.
In total, I made 10 indexes, 4 of which I actually printed and used—the other 6 were subindexes, later combined into 1 massive index and sorted.
My primary index, that covered all the textbook content, ended up being 2331 entries long. With alternate print settings, the printed version ended up being a bit over 20 pages (front and back) in length.
My secondary, command, index—which covered syntax—was only a mere 164 lines, spanning a bit more than 3 pages in length.
My lab index, covering content from interactive activities, was 328 lines, spanning a bit under 5 pages in length. Though, it should be mentioned that the way the lab index was organized is not a traditional indexing method, but it was a format that suited navigating lab examples better. Alongside the lab index, which was relatively confusing to use, was a table of contents that listed all the lab walkthroughs alongside a color and letter that corresponded with the tab color and letter of the physical copy.
In total, across 3 months, I covered 1852 pages of physical, textbook content and 603 pages of virtual lab content in a bit less than 130 hours. After reflection, I can’t help but admit that my index was a beyond overkill for the subject at hand, and that I could’ve spent more time remembering the information than indexing it.


Studying
Recall & Review